Showing posts with label breads. Show all posts

Tuesday, March 15, 2011

Billy Dough


This is an account of my pet dough, Billy. I kept him in an airtight container in my fridge, feeding him flour periodically over 4 days. Before each feed, I would deflate him a little, but he would always be bigger by the time the next feeding came around. With such tender loving care, he tasted really good. A  versatile white dough that tastes like a baguette. The long "growing" period pays off in the form of great flavour.

Here are his vitals, in case you want to keep your own Billy (you should. It's fun and he doesn't need supervision):

Day 1: In an airtight container, mix 112g bread flour + 2g yeast + 1g salt + 82g water. It will be like a sticky porridge. You may have to adjust the amount of flour depending on what brand you are using; I used Prima.

Day 2,3,4: Every day, add 5g (1/2 tbsp, leveled) bread flour, kneading it in for about 3 min. You can do this all in the container, just be sure to get to the flour at the corners too.

Day 5: It's time to bake Billy! Add 10g of bread flour, and knead in for 5 min. Divide into 6 pieces and shape into balls. Use up to 3g of flour during the shaping process, to prevent dough sticking to hands. Lay shaped dough on an oiled tray. Cover loosely with oiled cling wrap and let sit for 1.5 hours. Just before baking, cut 3 slits on the tops and brush with olive oil. If you like, push in some raisins. Bake at 220 deg c for 15min on the bottom rung, then shift to topmost rung till golden brown, taking care not to burn Billy.

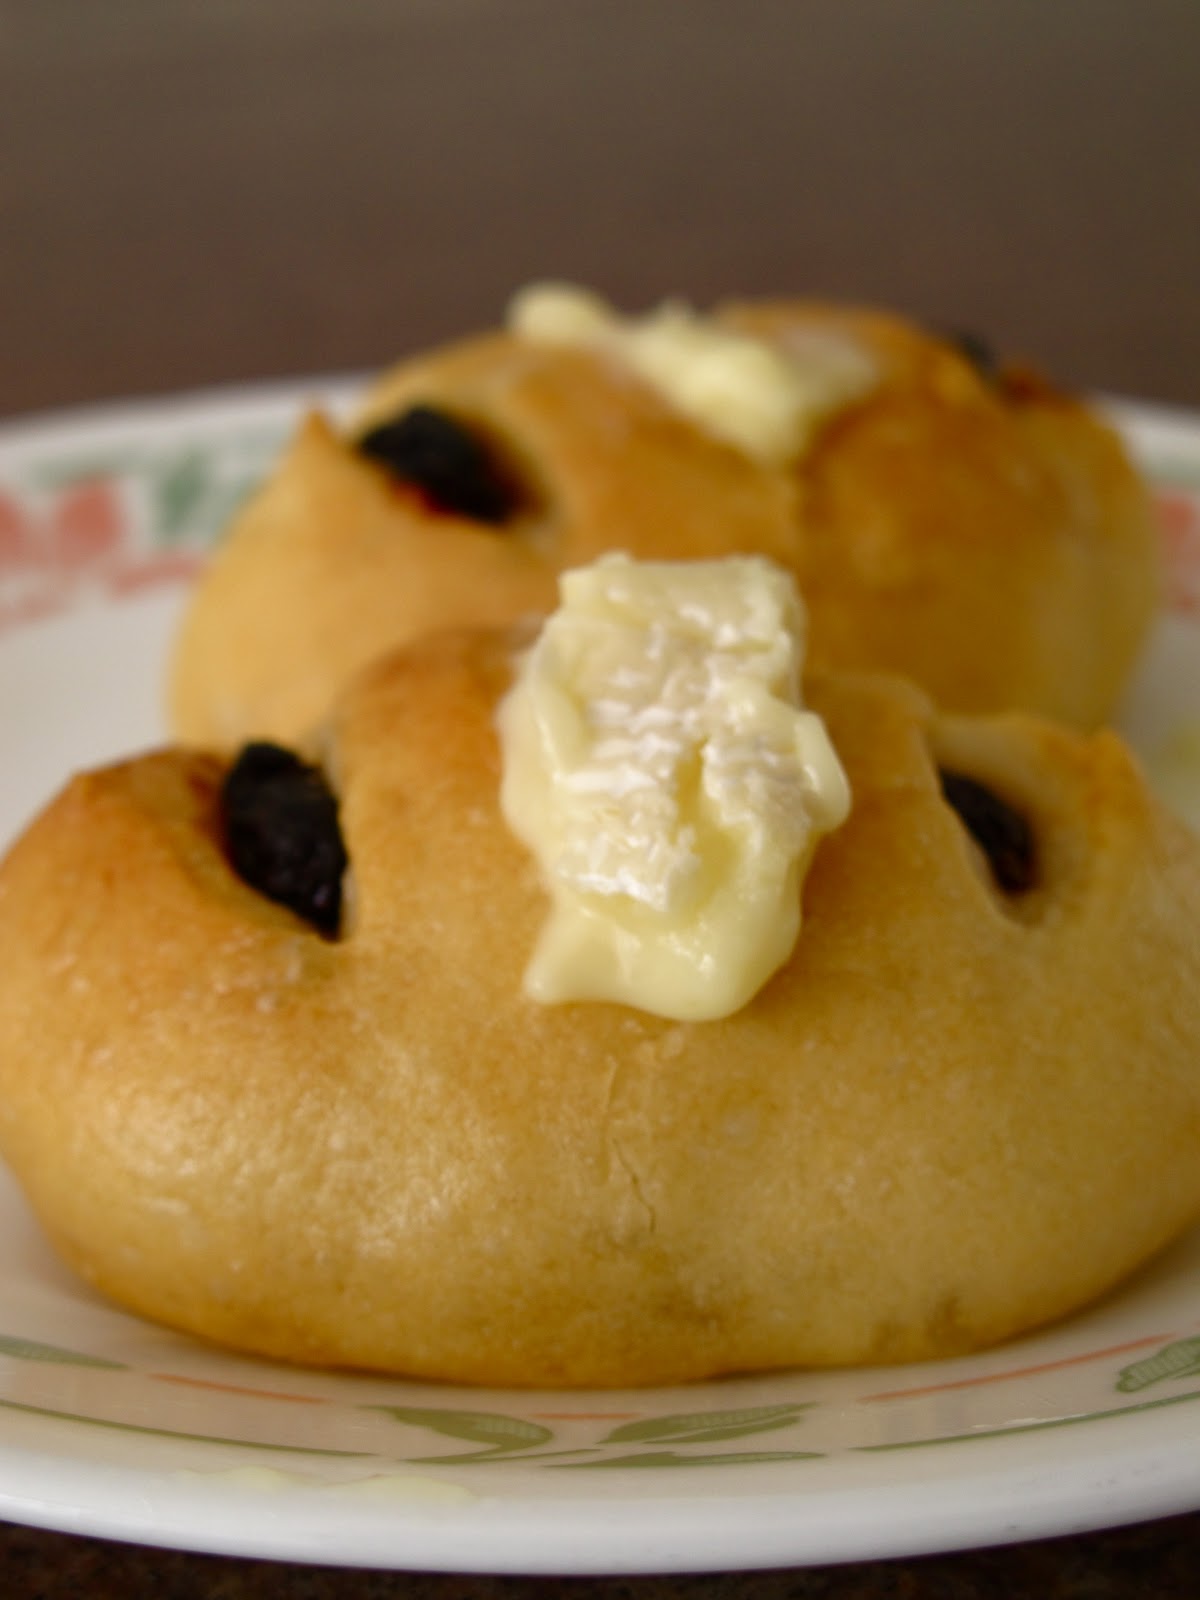
My favourite flavour combination at the moment: cheese and raisins
Very crunchy crust, and flavourful inside.

Friday, March 4, 2011

Char Siew Polo Buns

After leaving the optician's today, I was accosted by a Breadtalk poster. It showed me a picture of polo buns with glossy char siew filling. It told me I had to make polo buns soon: "Oh, how about today? It's just as well you're going to the supermarket. You could find all the ingredients there. Don't know what ingredients you need? Now why don't you sit down and order some of your favourite kueh pie tee, and maybe a teh si, and do an internet search for polo bun recipes?"

And then I thought about how much D liked polo buns and I relented. A good thing, because they turned out excellent.

I went home and discovered char siew marinating in the fridge for dinner (excellent!), so I used that for the char siew part and made the char siew sauce to go with. You can find the char siew + char siew sauce recipes here.

I got the bread dough and polo crumble recipes from here, but used the method from here to make the polo crumble. I made 5 instead of 4 buns with the given recipe. My dough required an extra 10g of water; possibly because I used a different brand of flour than the author (I used Prima bread flour). It also took an oven time of 23 min to brown adequately.


Divided the char siew filling into 5 portions before assembling the buns


After 1 hour of proofing

Baked!
Did a little experimenting with the polo crumble; I think applying an egg glaze and scoring pineapple pattern gives the best looking top.

Left to right: egg glaze and scored pattern, no egg glaze no pattern, egg glaze no pattern


Monday, February 28, 2011

Rosemary Focaccia

170g Unbleached plain flour (I used Gold Medal brand)
2/3 Tbsp Spelt or Semolina
2.5g dry instant yeast
2/3 Tbsp fine salt
1 and 2/3 Tbsp olive oil
117g water

2 springs of rosemary
A pinch of coarse salt

1. Mix together flour, Spelt/Semolina, and yeast in a large bowl
2. Mix in the fine salt 
3. Mix in water and olive oil till it all comes together to form a dough
4. Turn dough out onto a your work surface. Slide your fingers underneath the lump of dough, as if going to interlock fingers underneath the dough... but don't. Pull and stretch the dough, folding it in half over itself. Repeat this for about 10 min, till the dough feels less sticky and more responsive to your touch.
5. Shape dough into a ball and put in an oiled air tight container. Leave in the fridge for 2.5 hours.
6. Remove dough from fridge and gently pop it onto an oiled baking tray. 
7. With your fingers, make dimples in the dough, spreading it out to about 2 cm thick. Cover with cling wrap and leave to rise for 30 min at room temperature. Repeat the dimpling, this time pushing the rosemary leaves into the dough. Sprinkle the top with coarse salt and let rest for another 30 min. 
8. Bake at the 250 deg c for 15 min, or until golden brown.


Wednesday, November 17, 2010

Raisin Loaf

There's something pleasantly communal about a loaf of bread sitting on a slicing board, next to a bread knife, as if inviting hungry people to have a slice and be on their merry way. This raisin loaf is from Rose Levy Beranbaum's The Bread Bible. As you can see I'm baking my way through it!


The Dough Starter after spending a night under cling wrap, in the fridge

Bubbly and smelled like sweet alcohol. The yeast was eating the honey and doing it's job!

I stopped mixing when the stretchy dough slid lazily off the paddle.  Quite funny to watch!


Glossy and golden :)

Needs more raisins and cinnamon sugar!
Really satisfied with my first attempt at making a loaf of bread. Every time I opened the plastic bag with the half-eaten loaf, I could smell a sweet, heady, and milky aroma. It took 4 cycles of mixing/shaping followed by resting- and lots of patience! According to The Bread Bible, the multiple cycles contribute to a softer, finer crumb.

Improvements: I need to get my hands on an oil-based baking spray. This time I used mild olive oil to coat the loaf pan, which gave the crust a not-so-mild olive savoury taste that didn't agree with the raisins and cinnamon. Rose Levy Beranbaum advised against using butter to coat pans as they don't allow stuff to rise evenly during baking. 

One big lesson: let bread cool fully before putting it on a wooden board. I had to throw out the moldy-smelling board at the end of the day because it had absorbed the moisture from the warm loaf. Thank God for protective acid in our stomachs!

Saturday, November 13, 2010

Pizza Magherita

I went to the newly-opened Tools of The Trade (ToTT) along Bukit Timah Road yesterday. Right opposite MGS, where I spent 10 great years of growing up! ToTT carries all sorts of cool shenanigans:  rice cookers large enough for me to sit in, a sous vide machine, about 10 different sizes of hand whisks! 

My catch of the day was a metal pizza peel with a wooden handle. I took it home (after paying of course) and practised the slick motion of sliding a pizza into the oven. Mum called me the chinese quivalent of prissy for needing to use a peel, but hey, have you tried sliding a pizza from the back of an overturned tray onto the baking stone in a 250 deg c oven? HOT!  and besides, how cool is having a pizza peel? Totally adds to my Italian Mama-ness.

I broke in the peel with the pizza dough recipe from Rose Levy Beranbaum's The Bread Bible. It is excellent! Plus it tastes like my favourite bread: Turkish Bread! It's been difficult finding a good recipe for it, particularly because it's not common here.. I've only seen Carrefour carry it during Ramadan (looked unauthentic) and at some Turkish restaurant...but with a little tweaking, this may be the answer! 


Seconds later, the Basil turned colour from contact with the hot pizza

Thin crust: crispy on the bottom, very soft and slightly chewy at the edges. Unique and yum!

......................................................................................................................................................


Wednesday, September 1, 2010

Pizza Pillows

While sitting in class today, I decided to bake bread. Implusive baker! I missed the feeling of soft dough in my hands...And there were still many yet-to-be-tried recipes from my Richard Bertinet book. A reward to self for paying attention through a 3hr lecture... which I was, for the most part.

Love those curves!

The main problem I have with baking bread in Singapore is that it is too warm. Although the plus point is that it's humid enough that your dough will never dry out. While Monsieur Bertinet has to turn his oven on to get the heat going in the kitchen, I have to bring a fan in because the heat makes me antsy when I'm trying to concentrate. 

The warmth gives rise to 2 main problems:

1. Dough rises too fast! Since longer rising time = better flavour development, shorter rising time = quick but bland breads.

2. I can't follow the rising time stated in most cookbooks, which means I have to gauge for myself when the dough is ready to be turned out and shaped. If the dough is over-risen, it will not rise again after I've shaped it, so the baked bread is denser than it should be. Over-risen dough is also disobedient to shaping.

So this time, I tried to draw out the process by letting the dough rise in the fridge, covered with a damp tea towel. It worked! When I checked back at the appointed time, the dough had roughly doubled and there were little air bubbles just under the surface.

After the first rising

After being shaped, they rose well at the second rising. Nice and poofy.

Good luck, you guys!

And the baked result was yum! But I'd like a more intense bready-ness. I wanna get punched in the face with heady bready flavour! Which means I need to find a way to draw out the first rising even more. Perhaps adding less yeast and more salt could buy me some time, next time! 


..............................................................................................................


Tuesday, June 29, 2010

Pizza- the fat and the skinny

The world is divided on politics as it is on pizza crusts. Okay, I exaggerate. But like leftists and rightists, there are polar factions in the pizza world: Thick or thin? Chewy or crunchy? Bready or biscuity?

I pretty much grew up with an idea of pizza as pizza hut's deep pan pizza. Until they decided to jump onto the bandwagon of thin crusts! Suddenly it was the thinner the better- not unlike the trend with runway models! And now we've come one full circle where thicker crusts have won back part of the crowd. And critics finally decide that there's such a thing as too skinny-- for runway models, that is.


Let me introduce you to my Man-size pizza. I think it goes past the point of thick to fat.


Made with the pizza crust recipe from Rose Levy Beranbum's The Bread Bible.  I absolutely loved the heady bready flavour of the crust- the result of 4 hours of dough-rising, instead of the usual 2. It also made into a lovely garlic bread, as you can see in the background. The best part was that the crunchy shell gave way to a chewy interior. So yes, it is both crunchy and chewy! I think I hear applause.


And this is my skinny pizza.
Gives a satisfying crunch, and still bready! Which, to me, is important for a pizza. Being an italian bread, it needs to taste like bread, not like a biscuit. Made with the recipe on back of the lighthouse brand bread flour box (what a mouthful).


...............................................................................................................................................

Today, D and I took a drive to Maclaren Vale. Had great fun winding down the window and baah-ing at the grazing sheep, which looked like clouds on the ground. If I could have a pet, it'll be a sheep! And I'll keep in white and fluffy-- my personal cloud!

Saturday, June 12, 2010

Cinnamon Scrolls


The best part of cinnamon scrolls is not eating them, but the incredibly good smell that creeps out of the oven and surprises you as they're spending time in the oven. So, really, the best way of enjoying them is to make them yourself. And gobble them up when they're still warm. And you can be crazy generous with the cinnamon sugar, enough to make the store-bought ones hang their heads in shame for being so stingy.


Adapted from Smitten Kitchen


Makes 10 mini scrolls

For the dough

1/3 cup whole milk
1 Tbsp unsalted butter
4/5 cup  unbleached plain flour 
1/6 cup sugar
1/3 large egg
1 tsp dry instant yeast
1/2 tsp salt


For the filling
1/12 cup unsalted butter, softened
Splash of vanilla essence
Pinch of salt

3 Tbsp brown sugar
2 Tbsp ground cinnamon


1. Put milk and butter in a glass measuring cup and zap for 30s on high in microwave till temperature is about 60 degrees c. Pour into a big bowl. When temperature reaches 50 degrees c, add in 1/3 cup flour, yeast, sugar, egg, and salt. 


2. Mix with wooden spatula till combined, scraping down sides of the bowl. When combined, add the rest of the flour 2 Tbsp at a time, ensuring mixture is well combined before adding more flour. When mixture is just dry enough to knead, turn out onto a floured surface.


3. Keep sprinkling whatever flour you have left onto the dough as you knead. Keep kneading until you have a smooth and elastic dough. Stop adding flour when the dough just stops sticking to your hands.


4. Form into a ball and put in a well-oiled bowl. Cover bowl with cling wrap and set in a warm, draft-free place, until doubled. (About 2 hours depending on ambient conditions)


5. When almost doubled, make the filling by stirring vanilla essence and salt into softened butter. Mix together sugar and cinnamon. Taste and adjust sugar/cinnamon balance to your liking.


6. Remove dough from bowl and place gently onto floured surface. Roll out with a floured rolling pin to about 0.5 cm thick. Fold in the left and right sides in to make a rectangle, and roll lightly to secure.


7. Spread butter mixture onto dough, leaving 1cm border. Sprinkle on the cinnamon sugar.


8. Starting from the long side,  roll the dough up. Don't be afraid to give it a good pinch as you go to keep it compact.


9. Trim off both ends, then cut up rolls in your desired thickness.

10. Arrange in a well-oiled baking tray, cover tray with cling wrap, and let sit until almost doubled, about 50 min.


11. Bake at 190 degrees c, 15 min or until tops are golden. Turn out onto cooling rack quickly or they'll be soggy.


Note: 
Compared to the recipe on Smitten Kitchen, I found that it took less flour to achieve the desired dough consistency, and have reflected this in the recipe above. You may need to sprinkle less/ more flour depending on the brand you are using, since different flour absorbs moisture differently. As a guide, I used White Wings unbleached plain flour.